Red, White, and Blue Cheesecake Bars: A Make-Ahead Patriotic Dessert for Summer Parties
 Samantha
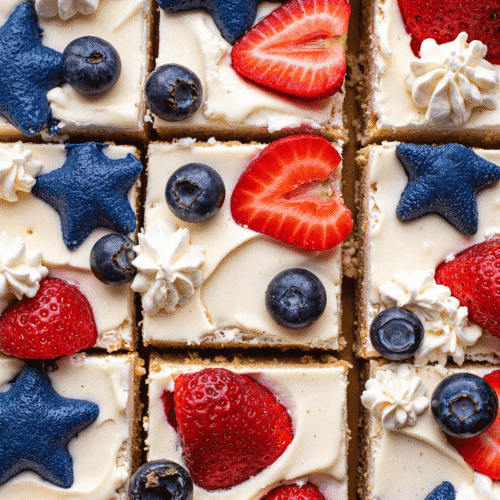
These Red, White, and Blue Cheesecake Bars are the perfect patriotic dessert for summer parties. With a buttery graham cracker crust, smooth cheesecake filling, and vibrant layers of fresh strawberries and blueberries, they’re festive, flavorful, and make-ahead friendly. Ideal for Fourth of July, Memorial Day, or any celebration where you want a colorful crowd-pleaser that’s easy to slice, serve, and share.
Prep Time 20 minutes mins
Cook Time 30 minutes mins
Chill Time 4 hours hrs
Total Time 4 hours hrs 50 minutes mins
Course Dessert, Make-Ahead Treat
Cuisine American
Servings 16 bars
Calories 215 kcal
- 1 ½ cups graham cracker crumbs
- ⅓ cup melted unsalted butter
- 2 tbsp granulated sugar
- 16 oz cream cheese softened
- ⅓ cup sour cream
- ⅔ cup sugar
- 2 large eggs
- 2 tsp vanilla extract
- 1 tbsp lemon juice
- ½ tsp lemon zest
- 1 cup sliced strawberries
- 1 cup blueberries
- Optional: whipped cream for topping
Prep the Pan: Line a 9×9 baking dish with parchment paper and preheat oven to 325°F.
Make the Crust: Combine graham crumbs, melted butter, and 2 tbsp sugar. Press into pan and bake for 8 minutes. Cool slightly.
Cheesecake Filling: Beat cream cheese until smooth. Add sugar, then mix in eggs, sour cream, vanilla, lemon juice, and zest until fully combined.
Bake: Pour filling over crust and smooth the top. Bake for 30-35 minutes until just set.
Cool and Chill: Let cool at room temp, then chill at least 3 hours (or overnight).
Top with Fruit: Once chilled, top evenly with strawberries and blueberries.
Slice and Serve: Cut into 12 bars. Add optional whipped cream before serving.
Pro Tips & Secret Tricks for the Best Red, White, and Blue Cheesecake Bars
1. Use room temperature cream cheese to ensure a silky-smooth filling without lumps. Cold cream cheese will clump and resist blending.
2. Add a touch of cornstarch (1 tablespoon) to the filling if you want ultra-clean slices that hold up well outside the fridge.
3. Line the baking pan with parchment paper, leaving overhang on the sides. This allows you to lift the entire cheesecake slab out before slicing for perfect, bakery-style bars.
4. Don’t overbake! The cheesecake is ready when the center still has a slight jiggle. It will firm up fully as it cools.
5. Chill overnight for best results. Four hours is the minimum, but overnight chilling improves flavor and texture dramatically.
6. Dry the berries thoroughly before topping. This prevents juices from running and making the cheesecake soggy or discolored.
7. For an elegant touch, brush berries with warmed apricot jam to create a glossy finish that looks like it came from a patisserie.
8. Cut with a hot knife. Dip your knife in hot water and wipe clean between each slice for crisp edges and no drag.
9. Use a springform pan if doubling the recipe. It ensures even baking and makes transferring to a serving platter easier.
10. Freeze the bars without toppings. Add fruit after thawing to preserve both texture and color. This is perfect for prepping ahead for large events.
Want to boost the health factor? Swap sour cream with Greek yogurt and reduce sugar slightly without losing flavor—perfect for wellness-focused guests!
Keyword berry cheesecake bars recipe, easy layered cheesecake bars, fourth of july dessert bars, gluten free patriotic dessert, holiday cheesecake bites, make ahead cheesecake bars, no bake patriotic cheesecake, patriotic cheesecake bars, red white and blue cheesecake bars, summer berry cheesecake squares